Bathroom ‘Before’
When we think back to the state the bathroom was in when we purchased this farmhouse, ‘disgusting’ and ‘dated’ were compliments. If you did not see the previous article, “Sight Unseen Revealed”, here are a couple pictures of the bathroom prior to when we started demolition:
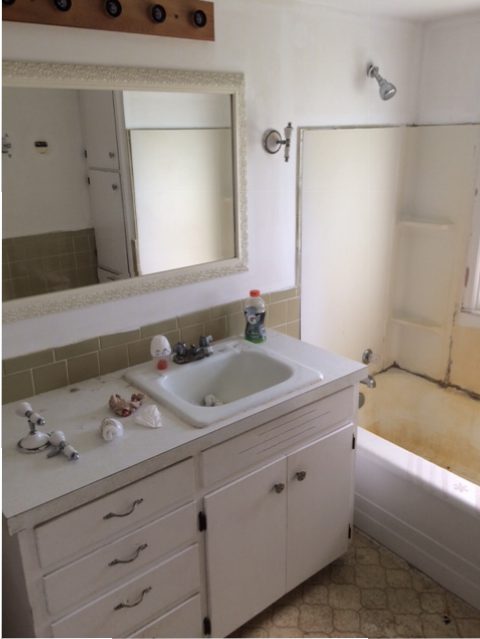
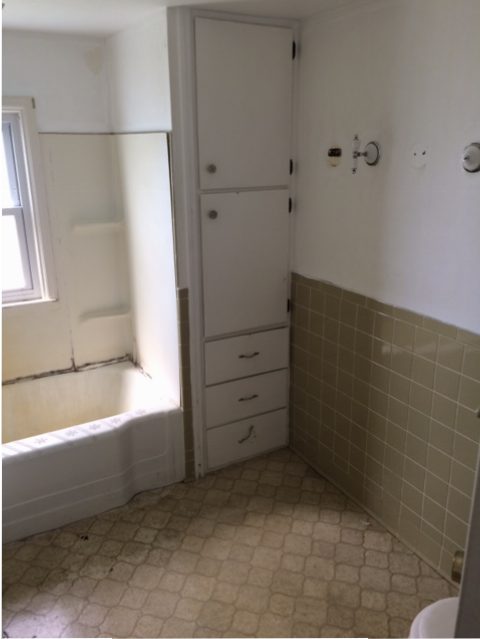
Basically, everything had to go. The vanity was disgusting and the sink drain was not even attached to anything, the green wall tile was a handful of decades old, the shower had mold at every seam, the corner cupboards were so disgusting–they were beyond cleaning, and there was numerous layers of floor. The toilet was a sight in itself. It was beyond stained from both use and the well water, it had the old ‘squishy’ vinyl seat that had mold within the seams, however, it DID flush. Even though it did work, I think I would have gone to the near by gas station to chance that restroom over using this one!
Demolition
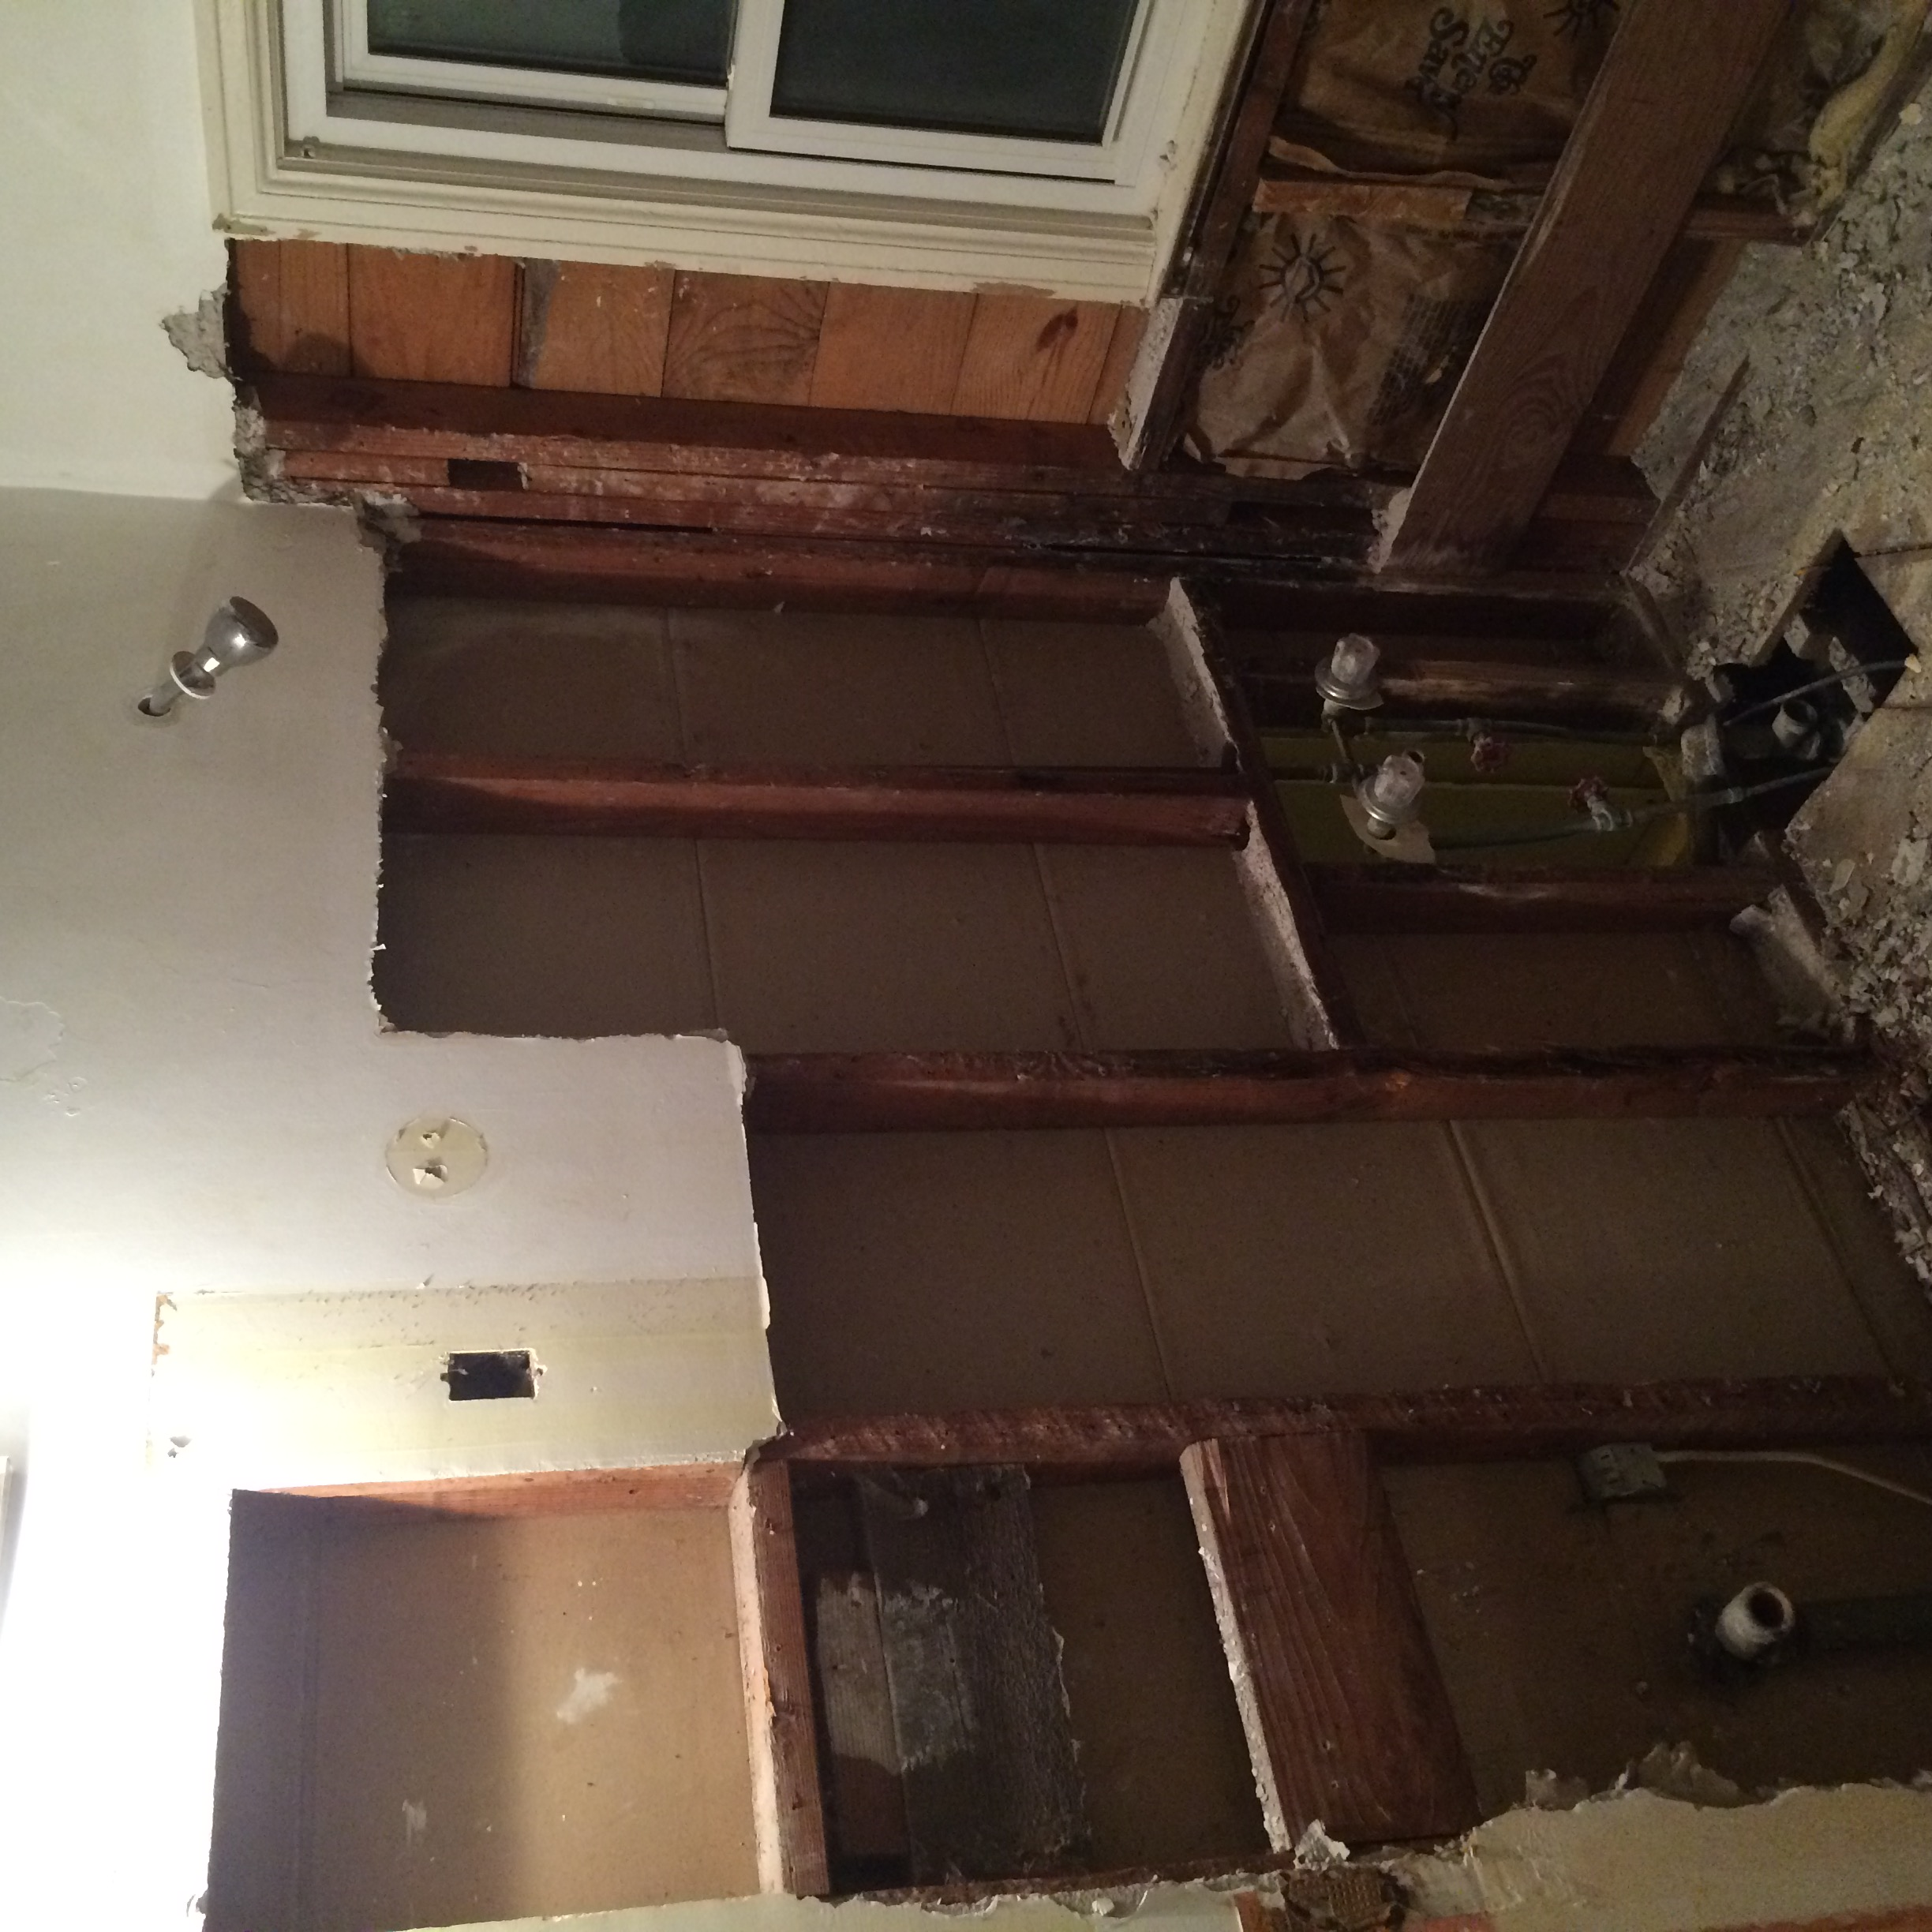
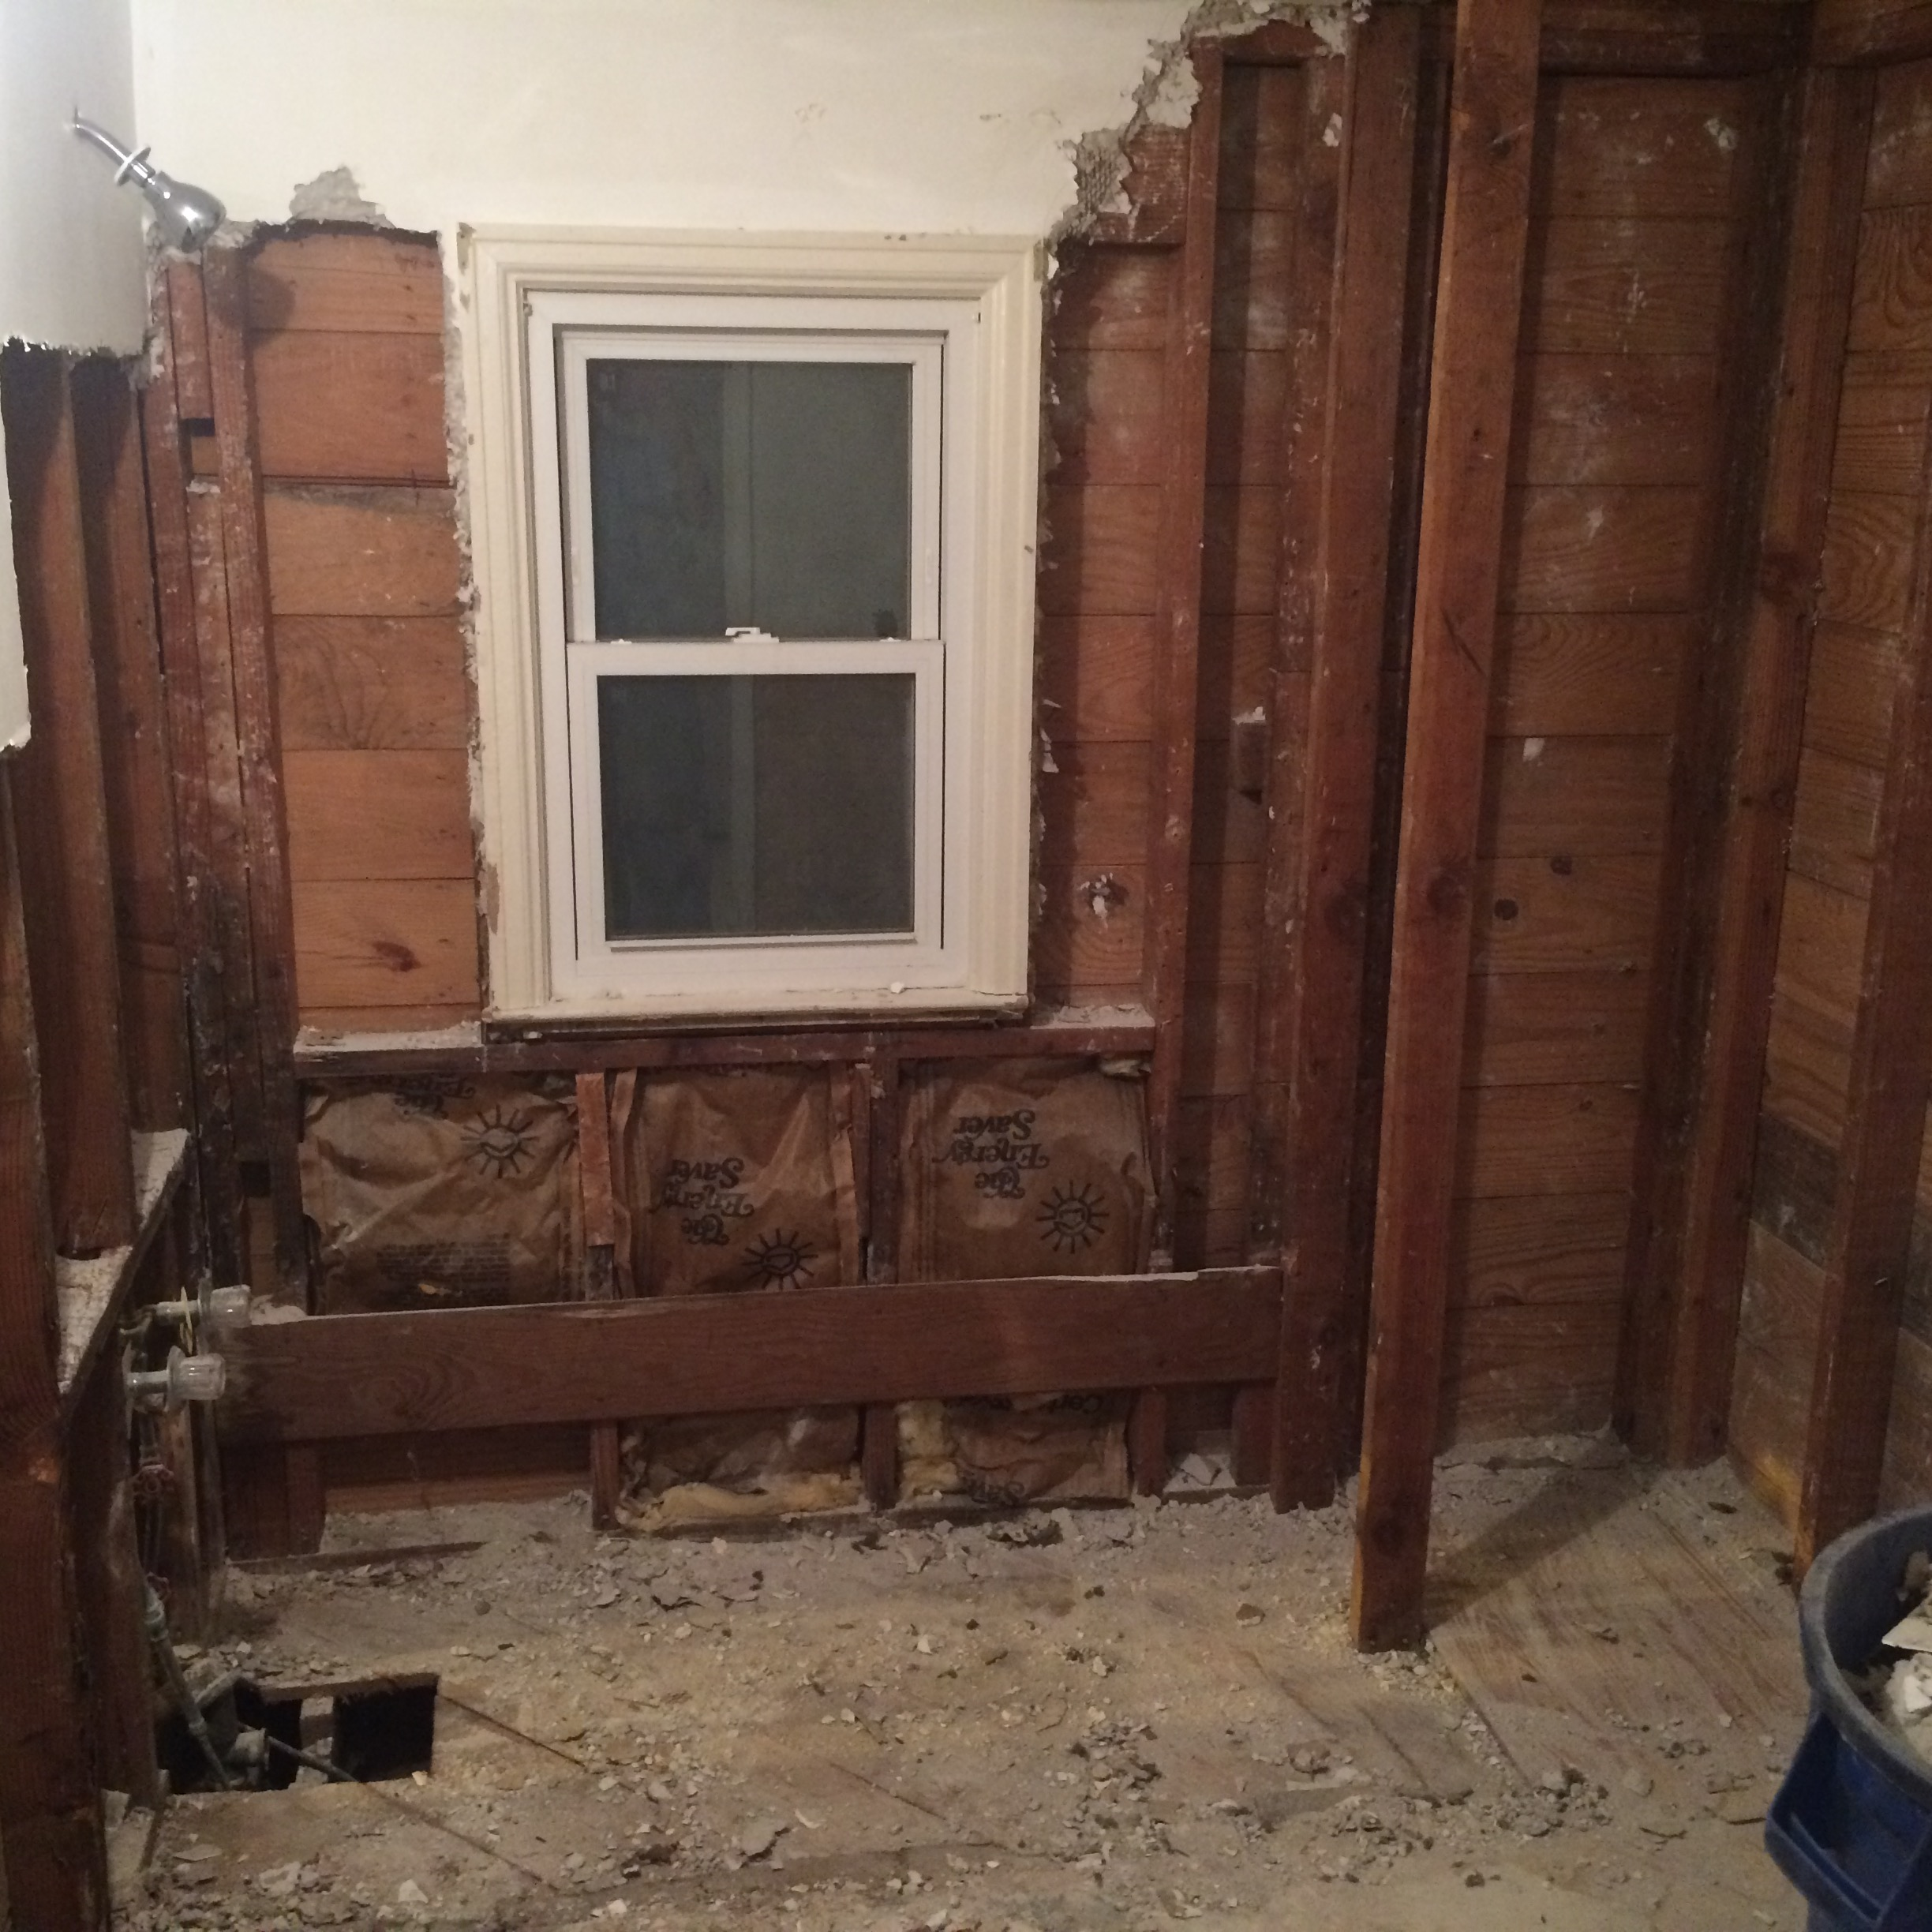
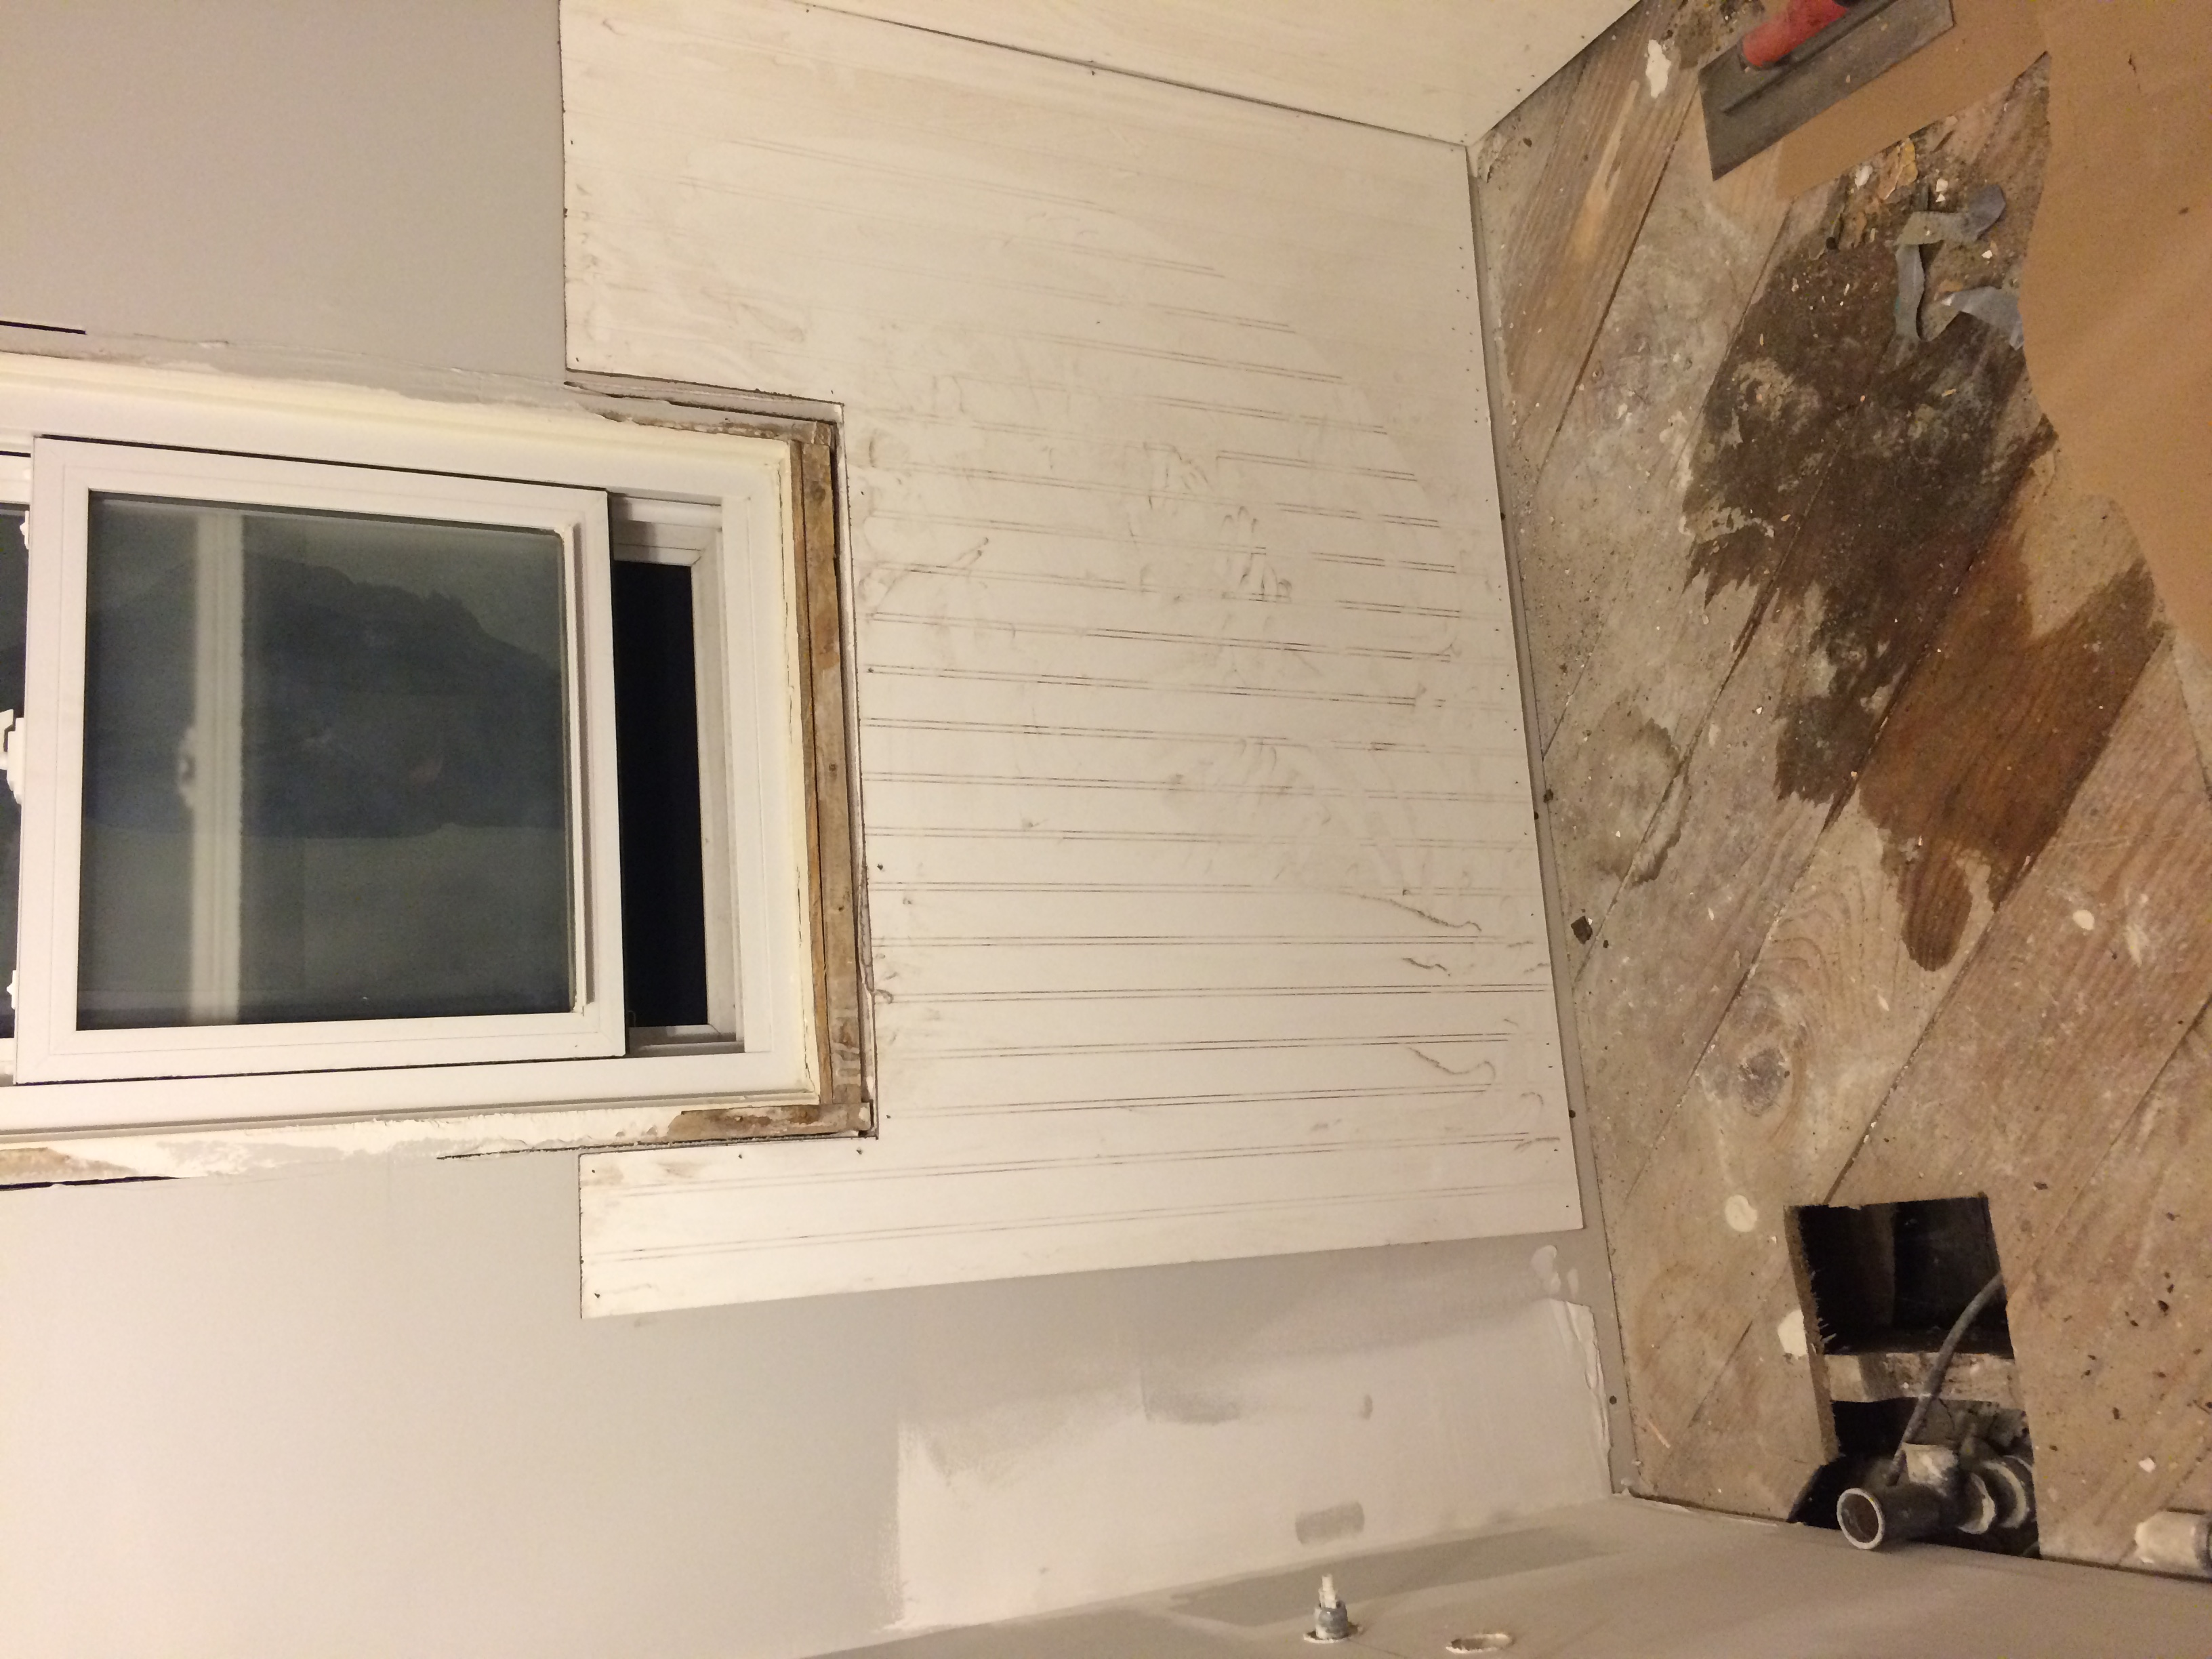
The demolition that had to take place in this bathroom was not a ‘quick task’. We decided to save the mirror to put back up later, but that was the only thing that survived. The easiest removal was the shower enclosure since it was glued to the tile (I cannot believe someone actually did that!), then came all the tile. I had a friend from work who was dying to do some demo, so she came over that evening ready to work. She went to town in that bathroom with me! I gave her a mask and a full size sledge and the dust flew. Tile fell into that tub at an incredible rate followed by plaster. We also destroyed that corner cabinet and took our parts of the ceiling. Next came all the beautiful green tile. Whoever installed that tile decades ago, put it up to stay there for a century! Tile by tile, the green was slowly leaving that bathroom. Now let me tell you, those tiles are razor sharp!! While picking up handfuls of tile, I sliced the end of my finger. I actually saw blood spatter on the tiles before I felt my finger pulsating. I got it to stop bleeding enough to take a picture and text it to a friend who is a physician. I didn’t want to waste time going to the hospital if I didn’t have to! It was deemed ‘not stitchable’, so I wrapped it up with what we had and went back to the tile. We ended up losing some of the plaster under the tile, which was ok because we planned to put bead board on the bottom half of the walls.
Once we had everything along that wall down to the studs, it was time to wrestle the beast—the cast iron tub. It had an imprinted floral design along the top edges and was quite stained. Getting it out was a chore in itself. Once the top edges were clear and the plumbing was out of the way, my husband used a dolly to get under the top and kind of rock it up and down. It slowly started to slide away from the outer wall. By the time we got it out and to the door (which only had 24 inches of width to it), I told my husband, “This is going to take more than me and you to tip this thing up, turn it, get it through the house, through 2 more doorways, and out to the garage.” We decided that it looked good where it was for the day and called in the help of my brother to get it out later that week. Once the tub was out, we found that the original floors did not continue under the tub. Bummer…..but I had a plan.
Progress….
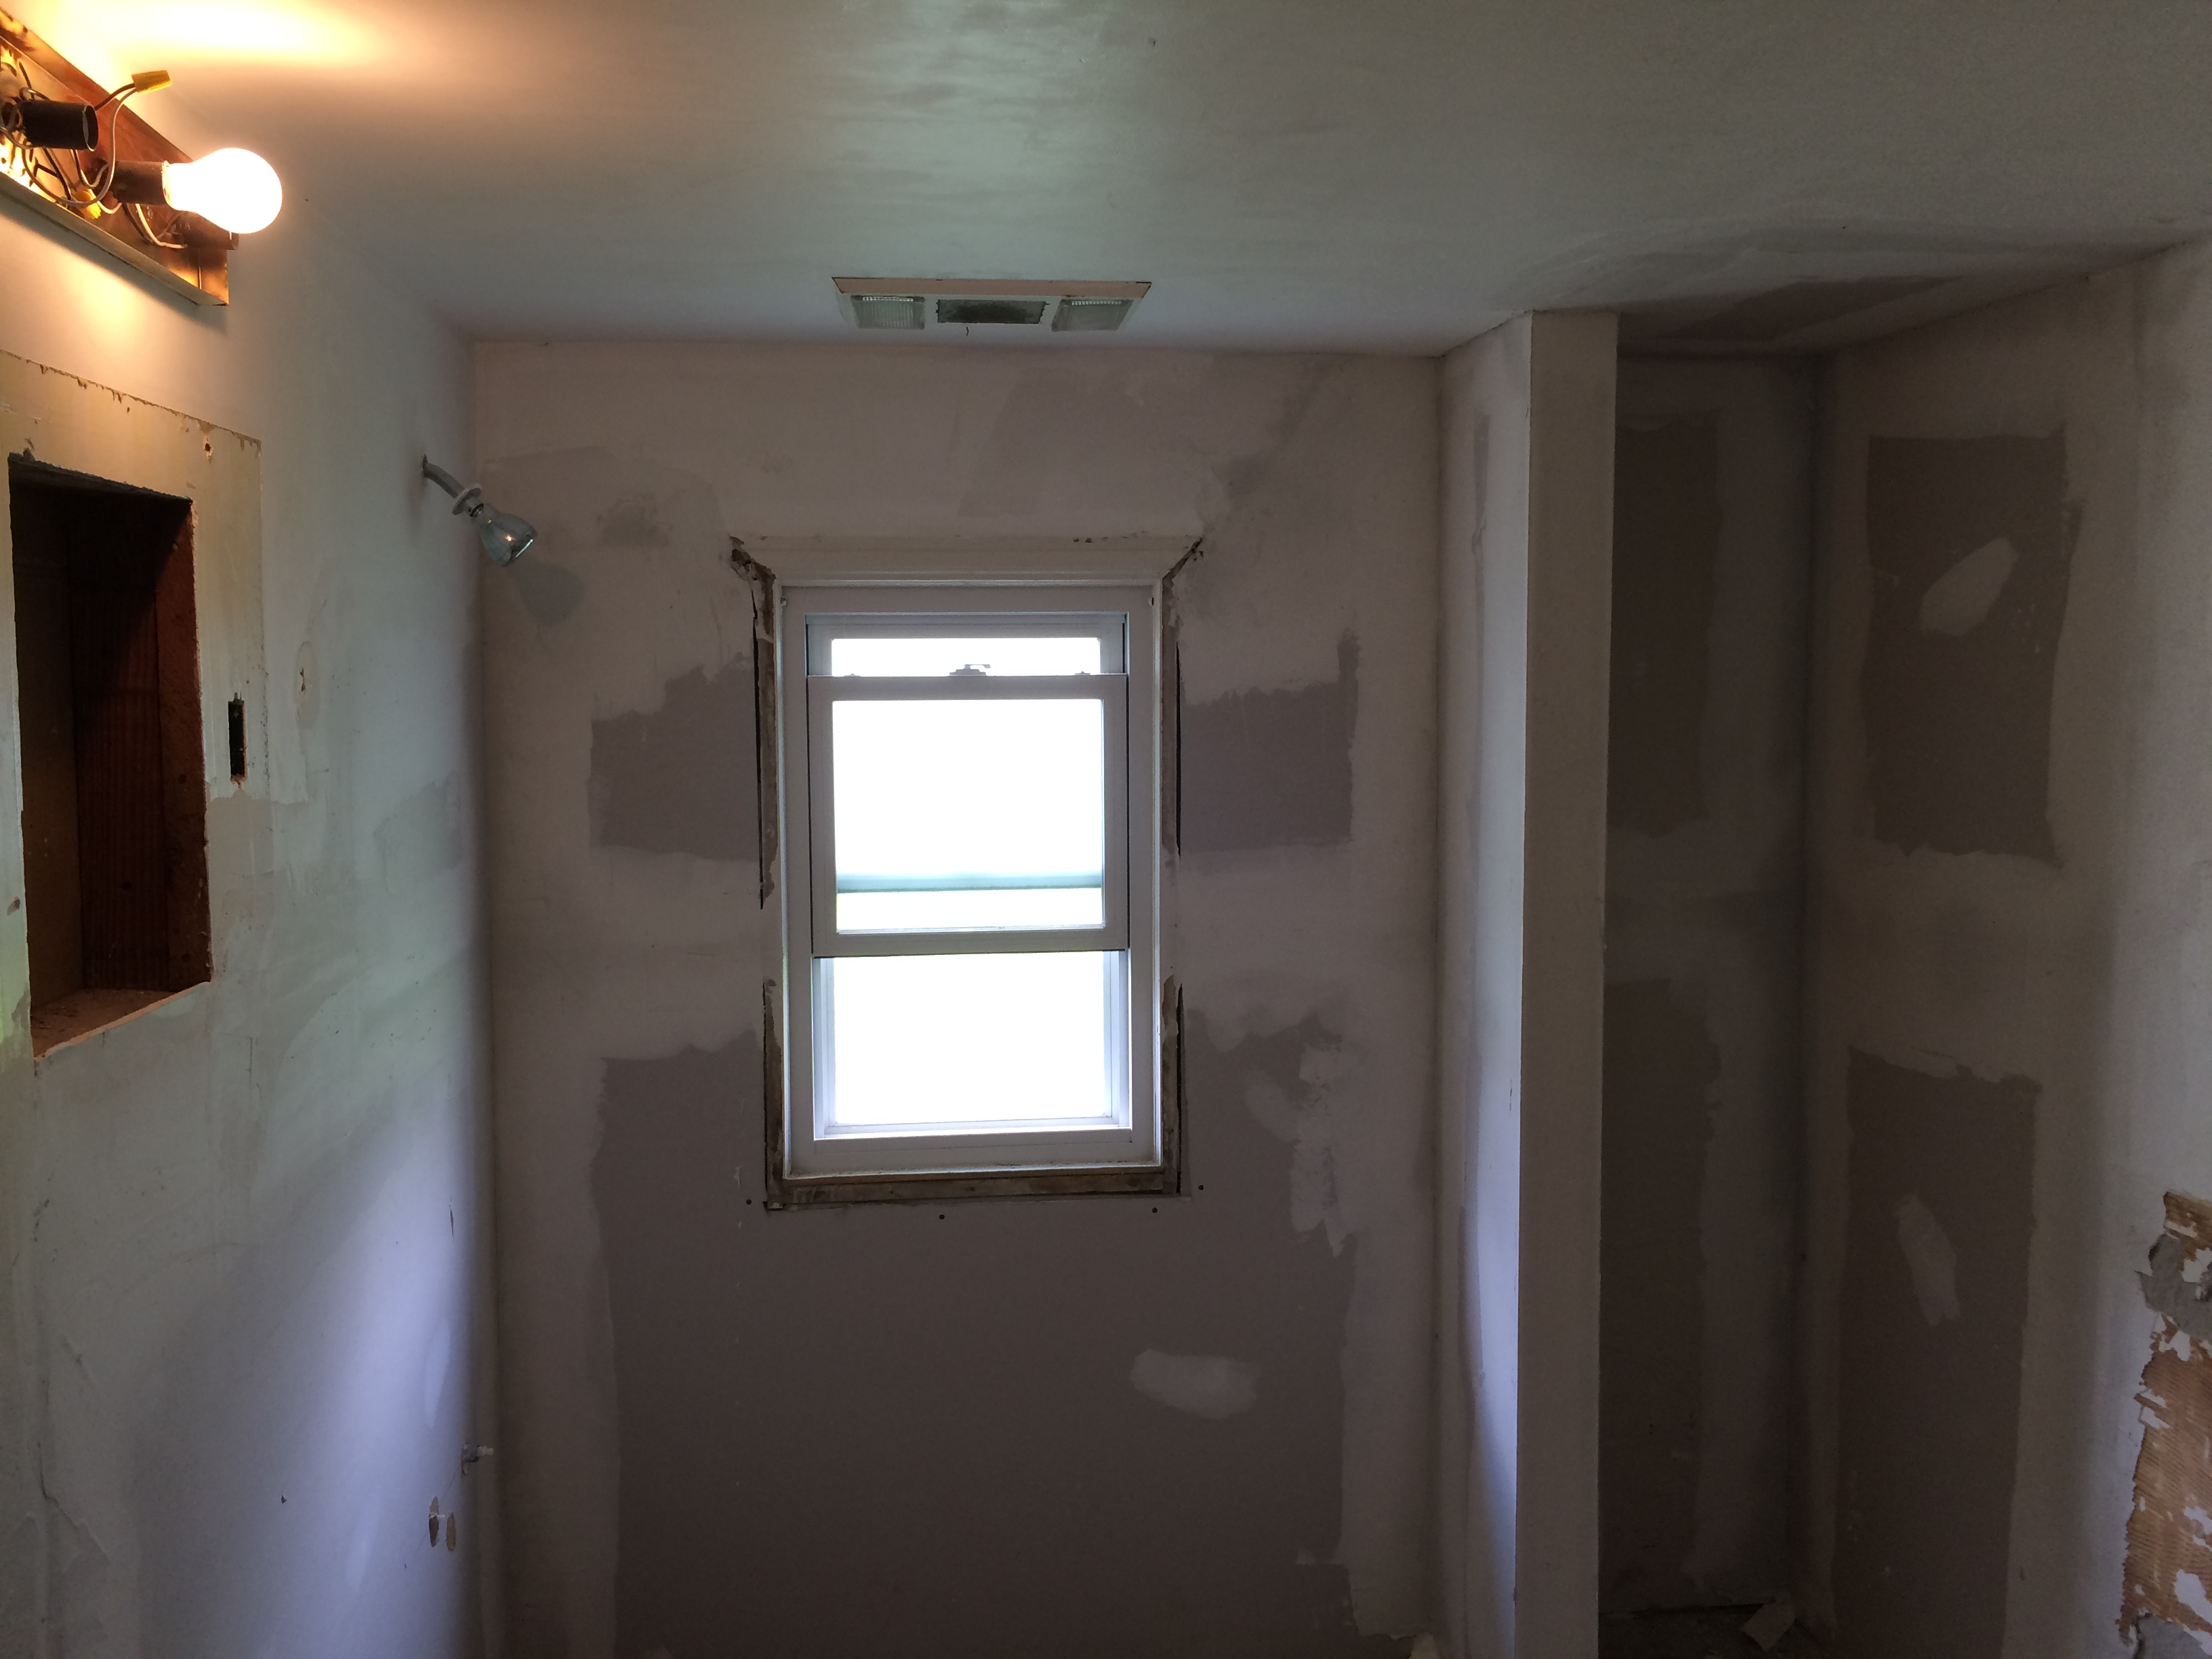
With the bathroom finally torn apart and all the disgusting fixtures out of there, and a chunk of the bathroom down to the studs, we were starting to see some progress. Our kids thought it looked scary and were not so sure about the whole situation.
What about the floors you might ask? Well, whoever stuck down all those layers of flooring must have been related to the tile installer….those floors were meant to stay! My husband worked at those floors on multiple occasions, using a variety of scrapers, shovels, and tools and only small bits of flooring would come up at a time.
One day, my dad (aka the work horse), decided he was going to go to the house and get all that flooring up. He spent most of the day there scraping away at it. Later that afternoon, he texted a picture of the exposed original floors captioned ‘I win’. We could not believe he got all of those layers of flooring up! Shear determination!
Putting it back together
Just as quick as we finished demo, the bathroom started coming back together. The drywall was up and ready for paint. My husband and my dad got the bead board up, followed by trim which was all freshly painted as well. I went online shopping for fixtures to complete the look we were going for. I found a vanity with marble top and soft closing drawers, as well as a claw foot tub. My husband went and selected tile from our local hardware store to tie in the original floor, but also make the claw foot tub a showpiece.
The Finished Product
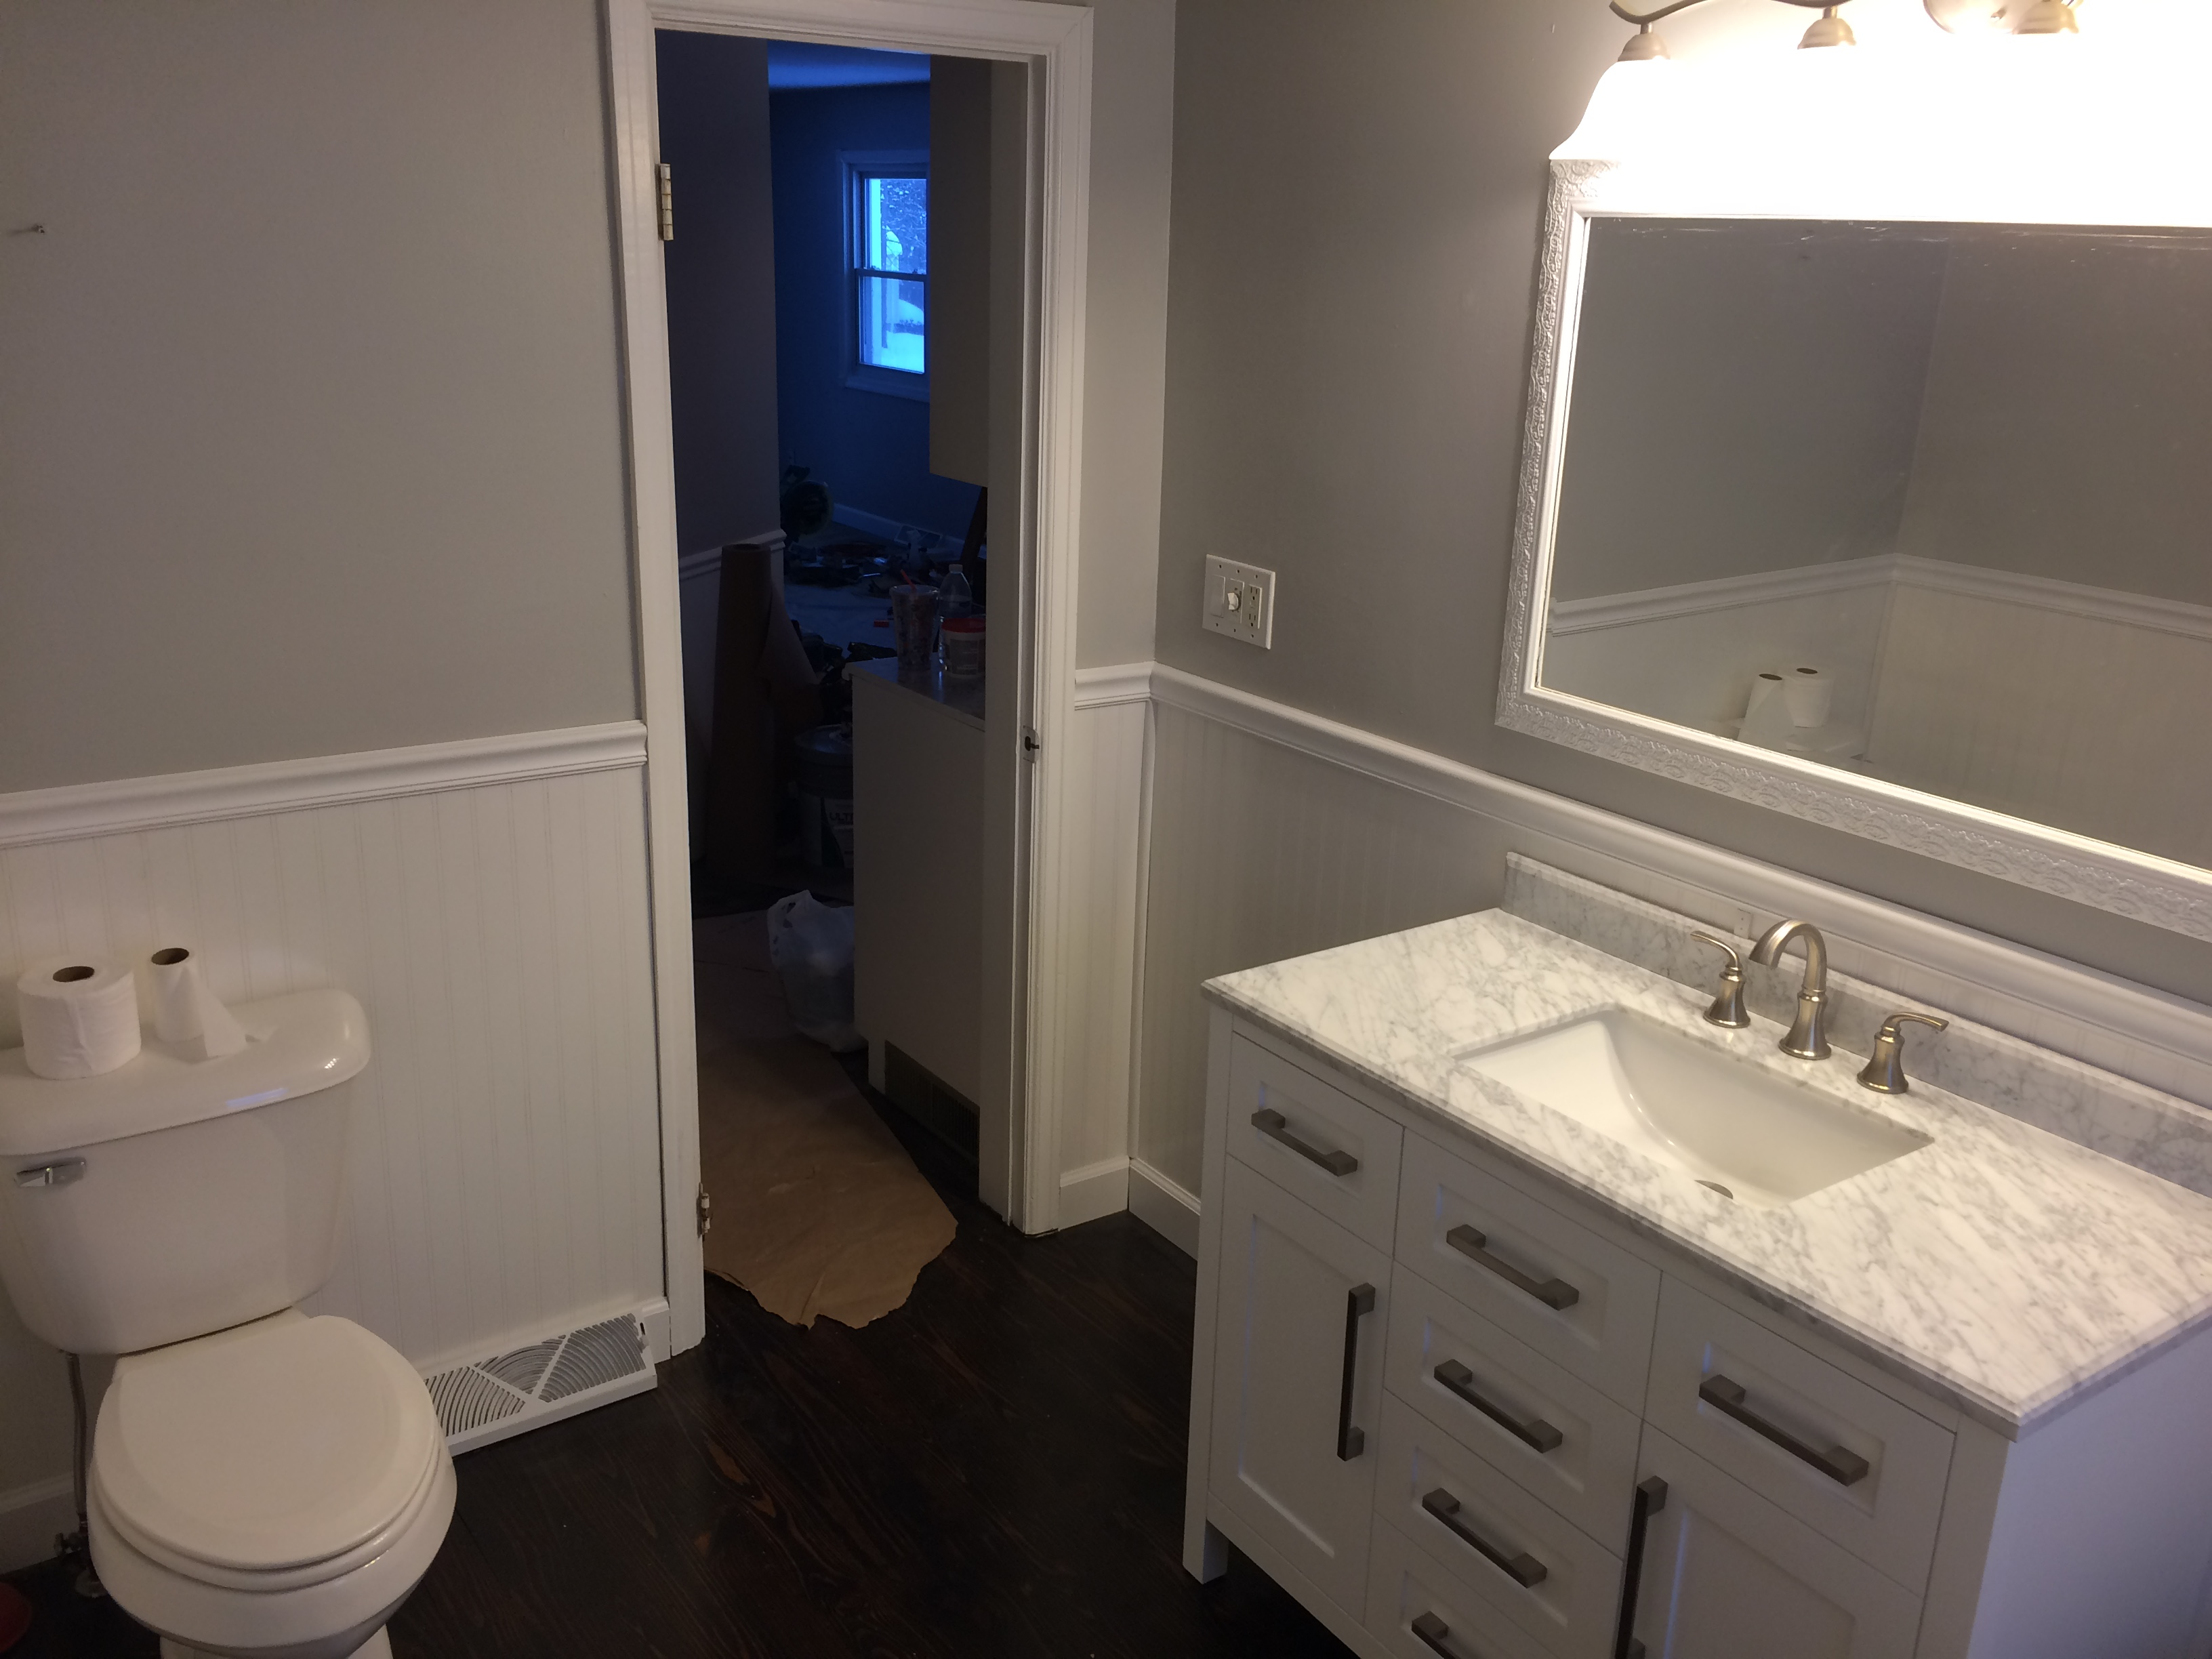
This bathroom had a lot of blood, sweat, and tears put into it to make it what it is today!
What do you think??