It is no secret that pallet projects have become a popular accent to a variety of rooms–whether it be a pallet wall or pallet piece of art there is SO much you can do with them. These projects can fit into any space in your home– it can be in your front entry, master bedroom, or an accent wall somewhere else in your house, this is an easy project that anyone can tackle! And guess what, it doesn’t have to break the bank and the possibilities are ENDLESS!
How to Get Started on Your Pallet Wall
Well the obvious first step is to get your hands on some pallets! Some people buy pallets, but you can really get pallets for free. My husband drives a truck around town all day and most companies that get shipments all day long have an overabundance of pallets and will often give them away for free. We have done two pallet projects and have not spent a dime on any pallets—so don’t do it!!

Once you have your boards it is time to get out that sander! All of the boards need to be sanded down and super smooth. We recommend sanding multiple times using 60, then 80, then 120 grit paper to get the best surface. Once you have them all sanded, it is time to plan out your space!

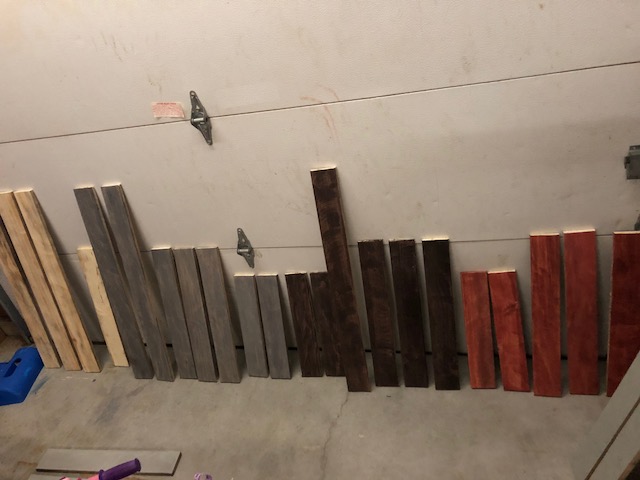
Vary Lengths
Nothing looks more dorky than having all of the same length boards with matching seams on the wall. It is good to have a pattern, but not super matchy. Tim actually spent one night drawing out what he wanted this wall to look like. We took measurements of the space (a bump out in the living room) and divided it out into sections for each row of board. With a ‘map’ in hand, all of the different lengths can be cut. With varied lengths of board, your pallet wall will not look like a first attempt DIY or bud light project. Planning and prep is key!
Different Colors
There are so many stain colors out there to choose from and each project only takes minimal stain. Do not, I repeat, DO NOT buy an entire gallon of stain for this project. You will use so little, it is not worth it at all!! For this pallet wall, Tim had stain leftover from a different project and then went to Lowe’s and grabbed three other colors of stain off the clearance shelf. These baby sized cans of stain were the only item that was purchased for this project and it came to less than $10!! Woot!
Poly
Once you have completed applying your stain, it is time to coat your boards with polyurethane. This seals your stain to your board and will make your project last longer. You have put in this much time and energy already, apply the poly to make it last! One coat of poly should do…..it isn’t like flooring that require multiple layers.
Finishing up your pallet wall
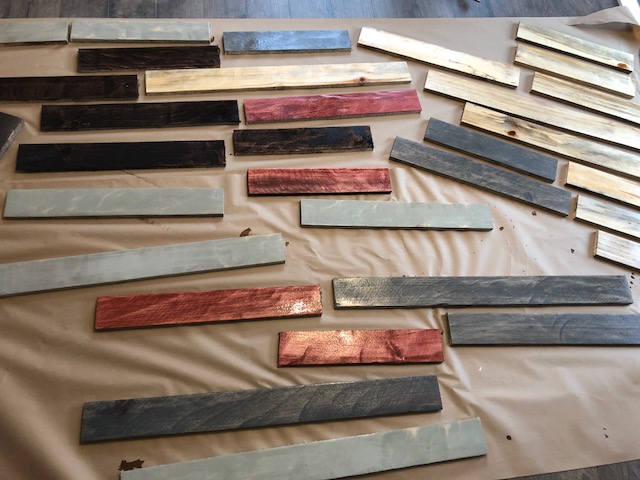
You are almost there!! Now that you have your boards sanded, cut a variety of lengths, sanded, and poly’d, it is time to execute your artistic plan and get those boards up on the wall! If you have a nail gun and compressor, this will go much quicker than an old fashioned hammer and nails! Before you start nailing up your pallets, be sure you like your design. One easy trick is laying out your boards on the floor in the way that you plan to put them on the wall to see if you will like it or not. If you don’t it is much easier to change on the floor rather than after you nail it to the wall! 😉
Once you like it, nail it up! Then stand back and admire your finished project that didn’t even break the bank! Our wall below cost us less than $10!! AND…now that we have all of the stains, our next pallet wall will be FREE!!
